FLAT Synthetic Brush Small No. 30 (1.25in) ~-Annie Sloan Chalk Paint®
FLAT Synthetic Brush Small No. 30 (1.25in) ~-Annie Sloan Chalk Paint®
Couldn't load pickup availability
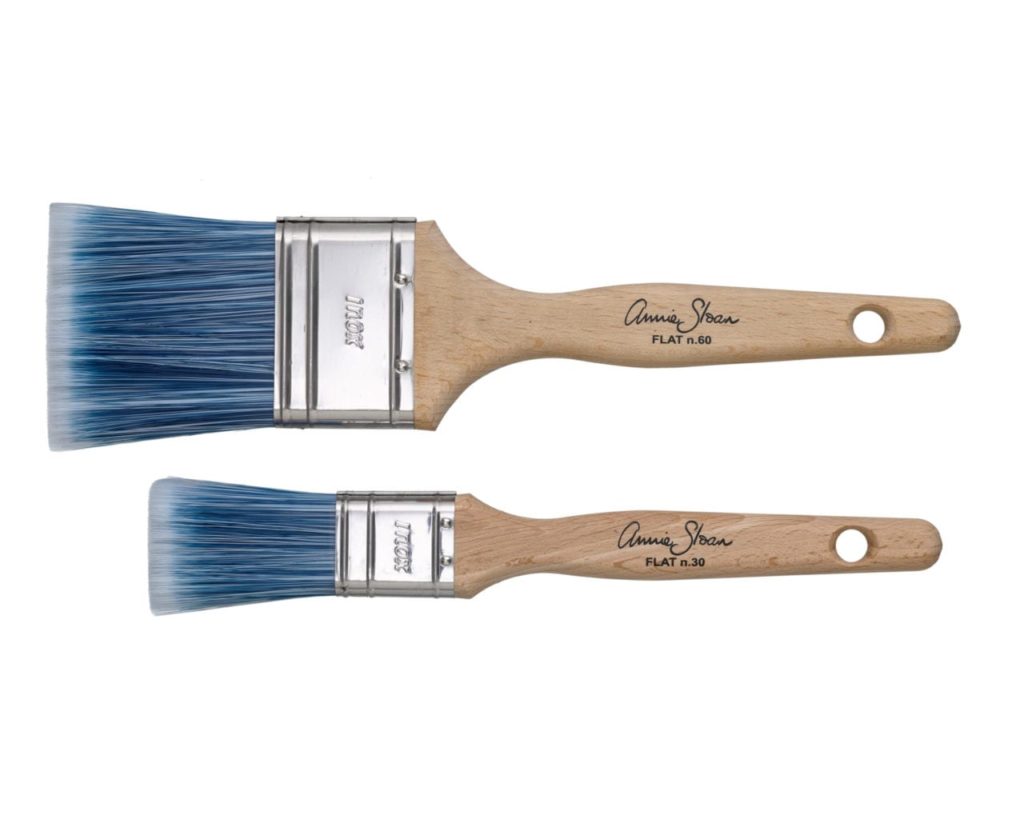
Annie Sloan's Flat Brushes feature advanced synthetic fibres, in a vibrant blue, which help to produce a smooth, contemporary finish. The Brushes are designed to take a large amount of paint and to apply the paint evenly, minimizing brush marks.
Choosing a brush
- SMALL NO. 30 (appx 1.25in Wide) The small brush for very small projects where a smooth finish is desired. We do not recommend this brush as the only brush to purchase when painting a dresser or other piece of furniture as it is likely to frustrate because it takes more time to achieve less coverage.
- LARGE NO. 60 (appx. 2in Wide) The large brush for all projects where a smooth finish is desired. This brush is best for kitchen or bathroom cupboards where an even finish with few to no brush stroke marks are the goal.
Chalk Paint Brush Care
Your brush will maintain its form and function - project after project, if you take the time to take care of it!
Wash your brush with soap and water immediately after use. We recommend a gentle dish or hand soap. Be careful to remove as much paint as possible by opening the bristles to get at the hidden paint.
Do not leave your brush to air dry as it will damage the bristles. Do not leave your brush sitting in water for long periods of time as it will damage your brush
![]()
How to Use Chalk Paint®
How to Use Chalk Paint®
As a rough guide, one litre of Chalk Paint® covers approximately 13 square metres, or the equivalent of a small welsh dresser or china hutch.
For most purposes, one to two coats of paint are enough. Chalk Paint® adheres to almost any surface, and there is rarely any need to sand or prime before painting. See ‘Dealing with stains coming through Chalk Paint®’ for when to prime or sand before painting.
To get started, tip the paint pot upside down and shake before use. Then open and stir well. If paint is too thick just add a little water and stir. For the best results, we recommend using a good quality paintbrush like the Chalk Paint® Brushes to apply the paint.
Always finish Chalk Paint® with either Chalk Paint® Wax or Lacquer for protection.
You can paint Chalk Paint® straight over Chalk Paint® Wax without removing the prior finish.
Finish with Chalk Paint® Wax
Finish with Chalk Paint® Wax
Chalk Paint® Wax is the perfect complement for Chalk Paint®. It adds durability, deepens the colours slightly and adds a very light sheen. It’s really easy to get sensational results – just use a Chalk Paint® Wax Brush or lint-free cloth to apply the wax to paint. Remove any excess sitting wax with a lint-free cloth.
Finishing Chalk Paint® with either wax or lacquer is essential; it will seal your finish for years to come and protect from scuffs and water marks.
As a very rough guide, you will need one 500ml tin of wax for every 3-4 litres of paint. This will vary depending on how many coats of paint or wax you use to cover a piece. And it’s always best to have a little wax left over for touching up. With the lid tightly on, it will last indefinitely.
For more information on Chalk Paint® Wax, watch Annie’s instructional video by clicking here.
Letting Chalk Paint® Wax Cure
Letting Chalk Paint® Wax Cure
After you’ve applied Chalk Paint® Wax, you’ll find that it will become dry to the touch very quickly. At this stage, it is still what you might call ‘soft’. It will start to harden as the solvents in the wax evaporate. This hardening process is known as ‘curing’. Curing can take between 5 and 21 days depending on ambient temperature.
You can use your finished piece straight away, but you may need to treat it with extra care until the wax has cured completely (you might want to use coasters, avoid sharp objects etc). Once cured, a piece of furniture painted with Chalk Paint® and finished with wax will stand up to normal wear and tear.
Chalk Paint® Wax is food-safe and toy-safe when completely cured.
Care for your Finished Project
Care for your Finished Project
Generally, wiping lightly with a damp/dry microfibre cloth should be sufficient to clean.
Stubborn marks on waxed pieces can often be removed with a little Clear Chalk Paint® Wax on a cloth, which acts as an eraser. If you choose to use cleaner you will eventually wear away the wax, but if you would prefer to use a mild surface cleaner apply using a cloth and test in an inconspicuous area first. Regular use of cleaning products may require re-waxing over time.
Always use heat mats and coasters to protect your painted and waxed surfaces. Keep away from extreme temperatures or humidity. Like you, your finish prefers a moderate climate!
Waxes dissolve in alcohol, so using it on bars is not advisable.
Avoid aerosol spray polishes as they may contain solvents or silicone that could dissolve the wax.
Using Chalk Paint® on Walls
Using Chalk Paint® on Walls
Chalk Paint® can be applied to walls. It gives a wonderful texture and matt look. Use a large brush to apply Chalk Paint® to walls. A brush will use less paint than a roller (see Annie and Felix’s experiment here) and will add depth and texture to the final finish. You can then wax the wall or leave it – bedroom walls look great with a soft, matte unwaxed finish.
Using Chalk Paint® on Floors
Using Chalk Paint® on Floors
Chalk Paint® can transform old concrete and wooden floors, even if they’re varnished. Just apply two or three coats of Chalk Paint® and finish with Chalk Paint® Lacquer for durability.
Always test the paint and lacquer on a few areas of the floor before you start, to check whether any stains will bleed through. Chalk Paint® Lacquer will often pull stains through that Chalk Paint® doesn’t, so it’s important to test with both.
For more detailed information on painting floors, watch Annie’s instructional video by clicking here.
Using Chalk Paint® on Kitchen Cabinets
Using Chalk Paint® on Kitchen Cabinets
You can achieve beautiful results using Chalk Paint® on – and in – your cabinets. Ensure they are spotlessly clean without using harsh chemicals before painting. Any residue oils left from kitchen-use will affect the finish. Apply at least two coats of paint, and then two or three coats of Chalk Paint® Wax or Chalk Paint® Lacquer to seal and protect them. Remember to always test your cabinets first with both paint and lacquer.
For more information on painting kitchen cabinets, watch Annie’s instructional video by clicking here.
Using Chalk Paint® in a Sprayer
Using Chalk Paint® in a Sprayer
Chalk Paint® can be sprayed, but you will need to experiment to get the right results from your particular model. The most important thing to know is that there is no ‘magic’ ratio of paint to water and you will need to tweak it every time you spray, as each paint colour has a slightly different viscosity.
Firstly, using an airless sprayer is not recommended – the high solids content in Chalk Paint® will damage the nozzle.
Warm paint will spray and settle better – place tin of Chalk Paint® in a bain marie of very hot water for 15 minutes. As a starting point, dilute to just under 20% with clean water then adjust as necessary.
You can also add a paint extender to help get a smooth finish.
For more information on how to apply Chalk Paint® with a spray gun, watch Annie’s instructional video by clicking here, and for applying Chalk Paint® Lacquer with a spray gun, click here.
Product Information Link
Product Information Link


